Showing posts with label current projects. Show all posts

9.04.2014

Sneak Peek :: Statements in Stone


My absolute favorite thing about jewelry making is working with natural gemstones. I love them all...from rough and raw, to polished and refined. It's so true that they carry their own unique energies. I can't explain it, but something about stones just draws me in. I often hoard them, not having a real clear vision of what I will make with the stones I buy {the stones used in the necklaces above I've had for at least 3 years}. If they call my name, I buy them. I usually store them in various places around my studio, just so I can soak up their energy and admire them each time I pass by. Eventually, they make their way onto my workbench and I stare at them until something happens. I work with them, arrange and rearrange, combine them with a mixture of metals and materials, step back, undo, redo, add more, subtract, revise, and repeat. Often, it's a frustrating process. But in the end, the piece created seems {to me} to take on whatever form it was meant to be. I especially love that each final piece is one of a kind and as unique as the stones themselves.


Some more lovelies I made over the past week. I've been busy this month, digging through my supply of gemstones to make all one of a kind pieces. It had been far too long since I had done that and my creative side was screaming for attention. The result--statement pieces in stone and mixed metals. I can't wait to share more with you!

If you're in the Kansas City area, you can come see them in person next weekend! I'll debut these babies and other lovelies at the Handmade & Vintage Chick Event. It's a pop up marketplace for all things handmade and vintage by local artists and artisans, complete with good eats by local restaurants and good beats by local musicians.


I'm really looking forward to it and hope to see you there!


9.30.2012

In the Studio :: almost finished

Has it seriously been 2 months since I last posted???  Just thought I'd pop in with a quick update.  Here are a few bits and pieces laying around my work table.. just waiting for some finishing touches.


Tiny tourmaline leaves wire wrapped to a sterling silver oval.  I love tourmaline!  I don't work with it often because frankly, it is so expensive!!!  I purchased a strand of these tourmaline leaves last year at a gem show and have only made one completed necklace using these beauties.  It was purchased before I had the chance to list it online.  Now I've started this focal piece... and can't decide whether to wire-wrap the leaves all the way around, or do something asymmetrical.  What do you think? 


Some oxidized sterling and gemstone pendants (top to bottom: phrenite, lepidochrosite, amethyst)


Glass droplets in a new design.  I'll probably make this available in several different color combinations.  What color combos are you partial to??


Gold plated pavĂ© beads in crystal and sapphire blue.. and a beautiful vintage brass bead with Austrian opalite crystals.  These will probably be necklaces.


Simple and elegant gold plated twig earrings with stick pearls.  I think these would be perfect for a candlelit dinner.  :)

So what are you working on at the moment?


P.S.
I know I mentioned a giveaway.  I actually had one on Sandy a la Mode a week or so ago, but didn't have a chance to blog about it.  But if you follow me on twitter or facebook, you knew.  ;)  If you missed out on that one, don't fret, I'm planning on another one, right here on my blog.  I'll make it special since you've been so patient with me. :)


6.17.2011

Why I've Been Missing...

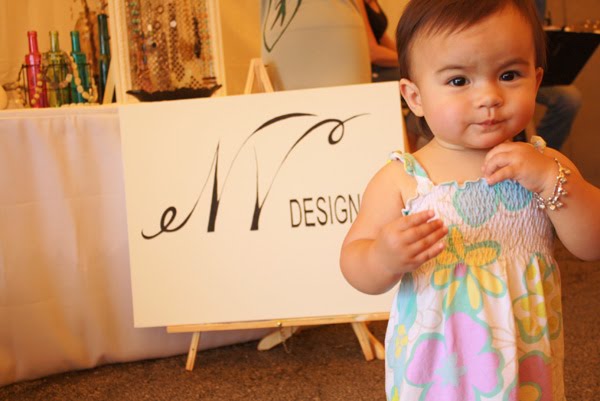
eNVe Design's first local boutique appearance!

My apologies for being invisible lately.  I've been extra busy the past couple months with an assortment of things on my plate, some of which was making lots of new jewelry for three shows, and brainstorming/building my display for Runways, a brand new collaborative boutique in Leawood, KS.  If you're in the Kansas City area, you can now shop eNVe in person!  And speaking of shopping, the Runways Grand Opening Event is tomorrow night!  10% of sales all day tomorrow and 100% of ticket sales to the Grand Opening Party tomorrow night will be donated to the Young Survivors Coalition of Kansas City.  If you're in the neighborhood, stop by.  I guarantee you'll have a blast!

So back to the display.  I didn't anticipate it, but putting together this display was time intensive!!!  There were many late nights, many moments of trial and error, many hours searching for the right tables (at yard sales, estate sales, furniture stores, etc.), and many hours at home depot.  Thank the high heavens for my amazing husband for taking my crazy idea and actually making it happen!

It all began with the idea that I wanted a wall of floating frames where I'd be able to display the necklaces and earrings.  I wanted the look of it to be consistent with my art show booth, with  mismatched but cohesive frames.  But I only had a 4x5 space to work with so we needed to build up to utilize the vertical space.  I didn't know the logistics of how this floating frame wall would happen so I enlisted my engineer husband for that part of the job.

Here's a peek at part of the process, from start to finish.  I originally intended to do a tutorial, but then things got so hectic and I didn't get a chance to take more pictures during the construction.  We just had to crank it out.  So if you really want to know all the materials and supplies we used, and what we did exactly, just email me and I can share that with you.  :) 

This was our first garage sale find.  It was perfect.. solid wood, good for refinishing, small enough to fit in the allotted display space, and it had these cool brass connector pieces (a tiny detail, but I am a big fan of detail).


With limited time, we couldn't sand the whole thing down for repainting, so instead, we went with "liquid sander", which cleans and deglosses the surface all at once, making it ready for paint as soon as it was dry.


 I went with the color palette used in the boutique so the display would have a cohesive look that complements the boutique decor.  I also wanted an "industrial chic" look and knew I wanted my tables to look a little distressed.  The three colors I used were a light grey, avocado green, and dark grey.  I painted the entire table the light grey, then once dried, painted a few sections green (the areas I would be distressing later).


Once all that was dry, I went over the entire table with the dark grey.  I wasn't sure what to do about the brass pieces, but ended up painting over them as well.  Then once the paint dried, I took some sand paper and went to town.  I sanded down most of the surface lightly, then used a little more elbow grease on select spots so that the green and light grey could show through.  I've actually never painted any kind of furniture before so this was a first for me.  I'm not even sure how it's supposed to be done, but I am really really pleased with how it turned out!


This first table was originally the one that was supposed to hold up the frame wall, but the more we thought about the structure of the floating frames, we decided it wouldn't be sturdy enough for it.  So after searching endlessly for the right table and not finding anything that I felt would work, my husband ended up building one for me!  All I wanted was a 3x4 table top and some sturdy legs.  It's crazy that I couldn't find anything like that anywhere, especially anything made of solid wood rather than particle board!  My husband definitely came to the rescue.   :)


Here's the table top (upside down) with a coat of primer on it.  Next are the legs and the frames, primed and ready for paint.


Rather than doing the 3 layers of paint (light grey/green/dark grey), I just painted the backs of the frames dark grey because I wasn't going to distress it at all.  I also skipped the light grey on the table (because the primer was white and pretty close to the light grey color) and painted the whole thing green, then dark grey.  Same thing for the legs.  Those got spots of green, then covered with dark grey.


Here are the frames (front side) in the arrangement that I wanted.  Hubs built a vertical wooden support structure in the shape of this arrangement (which I didn't get a pic of) and attached each frame to the structure (much easier said than done).  Prior to attaching each frame to the support structure, hooks or wire mesh were added to the frames for hanging jewelry.  I also had a custom mirror cut to put inside the large green frame.  Can't sell jewelry without a mirror.  :)


And here's a close up shot of the finished table.  The legs were bolted on with large bolts, to enhance the "industrial" look of it.  I distressed it the same way I did the smaller table and was pleasantly surprised by how the natural wood grains showed through!  I really want to repeat this project with some furniture for our home because I had so much fun with painting and sanding it down.  I just have to find the perfect furniture... and some time!


And here I am, placing my jewelry onto the finished display in the boutique.  Done, Voila!


Here's the back view of the display.  The small table was the perfect size for the all the accent display pieces I found.  I need to figure out what to do about that black area (the backside of the mirror).  I could either do a large product photo, or adhere some sort of decorative paper/fabric to it and add more hooks to the top of the frame to hang more necklaces... or???  If you have any ideas or suggestions, please please please share!  I hate that it's just a blank black space.


Here are some more views of the display.  Some earrings.....


The centerpiece -- my Signature Wrap and Thread Necklaces..........


And some delicate sterling and gemstone necklaces.


I'm really thrilled at how the whole project turned out!  I'm also happy that it's complete because while it was fun to brainstorm and build this display, it was definitely not conducive to adequate sleep.  

What fun projects have you been working on lately?


6.15.2010

My first art fest :: a complete wash


In case you were wondering why I had fallen off the face of the earth for the past couple weeks, I was prepping for my first show ever.  There were many questions I had to address and many details to attend to (what will my booth look like?  how in the world will I display my jewelry?  what new pieces should I make?  how many?  how do I accept credit cards?...).  Being the obsessive nut I am, I naturally obsessed over every detail.  Thank heavens my family and my husband's family were all in town (for our daughter's first birthday and baptism) so there were plenty of folks to hang out with the kids while I secluded myself in the studio.  And down to the last minute, I was prepping for the show.  It was exhausting!  Fortunately, I had help from  my sister, mom, husband, and in-laws, which made things go so much more smoothly.  So by the morning of the show, I was nervous but excited.  The day looked promising.  But as soon as we were done setting up my booth, the storm hit.


It was a continuous downpour for about 7 hours straight.  And the first couple hours, was torrential!  Despite being beneath a huge covered tent, I was wading in about 2 inches of water for a good part of the day.  And it was windy!!!  Thank heavens the artist next to me was a photographer who had huge walls for her booth.  If she hadn't been there, or if I was at the end of the row, my booth would've been a gonner.  The rain finally subsided by the afternoon and the sun actually came out during the last hour.  My water-logged feet were very thankful.


This was about as crowded as it was the entire day, and it was basically all the artists, visiting each other's booths.  At least I got to meet some really nice people, so that was a big plus.  And I managed to make just enough sales to cover the cost of the show so that was another plus.

Here are some snapshots of my booth.  Apologies for the poor pictures.  The lighting was so awful and weird that day so I couldn't get any good pictures.


The left side.  Those floating branches were individually screwed into the bases of those candle holders.  We also framed some perforated aluminum sheets to hang the earring cards.  Both worked beautifully, thanks to my husband and his father's handiwork.


The right side of the booth.  I had another framed aluminum sheet for my Daily Dose line (other side was my original line).  And can you spot some polymer 'crystals' by the talented Lynn of UnaOdd?  Please excuse the giant cup of coffee.  I had very little sleep the previous night.  :)


And here's the front (right) side of the booth.  The sign was a last minute effort.  I wanted to make my own unique banner, but I couldn't find an idea that I really liked just yet, so black paint on white canvas just had to do for the time being.  I wasn't crazy about it at first, but I ended up really liking how simple and elegant yet strong it looked, just bare bones.


A view from the far right side.


And here's the entire booth.  I hate how bare naked the back is.  I was originally going to put a 3 panel screen there, but the winds were so strong and beating so furiously on that tent wall, it would've fallen over, so I didn't bother.  I also wanted to have large product pictures displayed somehow, like along the backdrop, but hadn't quite settled on an idea that I liked and just ran out of time.  It was just another one of those things on my to-do list that I never got to do.  Oh well, next time will be better.


Oh and here's me and my highwaters, during the beginning of the flood (man I need a haircut. I hate how ponytails look on me).  Wow, you can see the water creeping up my tablecloth.  By the end of the day, it was soaked more than half way up.


My trusty model and I.  She's wearing a hand-painted original dress by Aidah Collection.

The kids and the rest of the family stopped by for the remaining hour of the show and they completely cheered me up.  I was trying to get a picture of both kids in front of my sign because they are my eNVe Designs originals.  But these shots were as good as I could get.  One and two-year-olds are tough to take pictures of!


And here is Kaili giving her daddy a spelling lesson...

"That's an "S" and don't forget the squiggly loop.. or squiggle-oop"

So all in all, I'm glad I ventured out of my comfort zone and finally did a show.  It didn't turn out well, but at least I'll be much more prepared the next time around.  

And now, I have about 300 new items to list!  It's daunting just thinking about it.  I better get started on those photos.  I'll be back again shortly to post about my warm hearts necklace whereabouts.  Stay tuned!


10.19.2009

Tribute to my Tomboy Days


When I was a kid, I was a little tomboy. And one of my favorite things to do (ever!) was play marbles. I was quite proud of my marble collection that grew with each victory in a marble game. I don't really know what happened to that marble collection... they've slipped out of sight and have gotten lost somewhere along my transition out of tomboyhood. Wish I still had them. So as a tribute to those days, I had been scouring the "interweb" (thanks, Tracy Jordan) for glass marble beads and to my surprise, they don't really exist!!! Can you believe it? That hasn't stopped me from looking regularly though.. (and still no luck). So knowing that, you can imagine how ecstatic I was when I found some at a recent trade show! There was only one strand available for purchase and I just didn't have the funds to splurge on it. Also to my surprise, they're rather pricey! BUT, the vendor also had an extremely rare strand of glass marble beads that she was selling per bead. And each glass marble bead had its own beautiful and distinct detail... and the rarity was that they were about 200 years old! No wonder it was sold per bead. It would've cost a small fortune to get them all, but I couldn't resist buying one. And there she is (above). Isn't she a beauty? And here she is as a necklace focal.. an early birthday present to myself. :)


I'd love to make more of these to share with all you other tomboys at heart! So my search for the perfect glass marble beads will continue... either that or figure out how to drill through regular glass marbles. Anyone have any leads?

P.S. I just listed a few new pieces today! More to come. Hope you can stop by to take a peek.

4.09.2009

Sneak Peek :: new necklaces


Some new necklaces will be sprouting up in my shop. I've been playing around with wire wrapping (which takes so much time and patience on my part). I hope you like the results! I've kept things light and airy so that the stones can just shine as they are.


And I've also gotten my hands on some gorgeous vintage Italian brass keys that I just had to make some pieces with. Here are a couple of new wrap and thread necklaces featuring a key as the focal. I'll list these as soon as I can get some better pictures taken (it was really cloudy the day I snapped these).

Any thoughts?? :)

And be sure to check back tomorrow for my next FEATURED ARTIST!