Showing posts with label in the studio. Show all posts

9.04.2014

Sneak Peek :: Statements in Stone


My absolute favorite thing about jewelry making is working with natural gemstones. I love them all...from rough and raw, to polished and refined. It's so true that they carry their own unique energies. I can't explain it, but something about stones just draws me in. I often hoard them, not having a real clear vision of what I will make with the stones I buy {the stones used in the necklaces above I've had for at least 3 years}. If they call my name, I buy them. I usually store them in various places around my studio, just so I can soak up their energy and admire them each time I pass by. Eventually, they make their way onto my workbench and I stare at them until something happens. I work with them, arrange and rearrange, combine them with a mixture of metals and materials, step back, undo, redo, add more, subtract, revise, and repeat. Often, it's a frustrating process. But in the end, the piece created seems {to me} to take on whatever form it was meant to be. I especially love that each final piece is one of a kind and as unique as the stones themselves.


Some more lovelies I made over the past week. I've been busy this month, digging through my supply of gemstones to make all one of a kind pieces. It had been far too long since I had done that and my creative side was screaming for attention. The result--statement pieces in stone and mixed metals. I can't wait to share more with you!

If you're in the Kansas City area, you can come see them in person next weekend! I'll debut these babies and other lovelies at the Handmade & Vintage Chick Event. It's a pop up marketplace for all things handmade and vintage by local artists and artisans, complete with good eats by local restaurants and good beats by local musicians.


I'm really looking forward to it and hope to see you there!


8.19.2014

In the Studio :: Metalsmith 101 with dad


One year, ten months, and nineteen days--the amount of time it takes for a lot of stuff to happen.. and I have zero blog posts to show for it. What can I say, life happens much faster than my speed of blogging! But one of the highlights of recent months is finally getting metalsmith lessons from my dad. For many years during my childhood, my father worked as a goldsmith. He did not immigrate to the states with this trade, but somehow taught himself soon after settling here. And all the equipment that I'm now using to learn this trade are the same pieces of equipment that my father worked on decades before. Rusty, dusty, and so full of history.


There is something very meditative about playing with a torch and some metal. I'm not sure what it is about it that I'm drawn to, but I'm enjoying every minute of it. And it is much harder than it looks. Good thing practicing is fun...and I have so much to learn!


Here are just a few preliminary pieces I made while practicing my soldering techniques. I've been using a lot of copper to practice with because it's more affordable than sterling silver and I have to say, I really love the look of it! Not so much a fan of the shiny copper look, but when oxidized and textured, copper really adds a nice rustic quality and dimension to jewelry. I've worked with copper in the past, but haven't used it much until recently and I've already incorporated copper into a lot of new jewelry pieces. They're not listed online yet and I'll probably debut them at my upcoming show next month!  Details soon.

It feels great to be blogging again. I'd love to hear what you think of my new layout and look!


9.30.2012

In the Studio :: almost finished

Has it seriously been 2 months since I last posted???  Just thought I'd pop in with a quick update.  Here are a few bits and pieces laying around my work table.. just waiting for some finishing touches.


Tiny tourmaline leaves wire wrapped to a sterling silver oval.  I love tourmaline!  I don't work with it often because frankly, it is so expensive!!!  I purchased a strand of these tourmaline leaves last year at a gem show and have only made one completed necklace using these beauties.  It was purchased before I had the chance to list it online.  Now I've started this focal piece... and can't decide whether to wire-wrap the leaves all the way around, or do something asymmetrical.  What do you think? 


Some oxidized sterling and gemstone pendants (top to bottom: phrenite, lepidochrosite, amethyst)


Glass droplets in a new design.  I'll probably make this available in several different color combinations.  What color combos are you partial to??


Gold plated pavĂ© beads in crystal and sapphire blue.. and a beautiful vintage brass bead with Austrian opalite crystals.  These will probably be necklaces.


Simple and elegant gold plated twig earrings with stick pearls.  I think these would be perfect for a candlelit dinner.  :)

So what are you working on at the moment?


P.S.
I know I mentioned a giveaway.  I actually had one on Sandy a la Mode a week or so ago, but didn't have a chance to blog about it.  But if you follow me on twitter or facebook, you knew.  ;)  If you missed out on that one, don't fret, I'm planning on another one, right here on my blog.  I'll make it special since you've been so patient with me. :)


3.30.2012

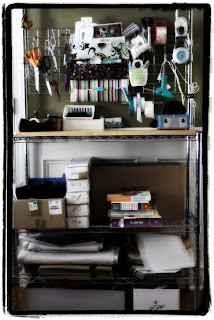
In the Studio :: a look at my work space


Welcome!  Until now, I don't think I've ever formally shared any pictures of my workspace.  So here it is!  Let me tell you, it is a work in progress (and is usually not this clean and organized).  I have also recently acquired all of my father's metalsmith tools and equipment that I am dying to set up in this room so I can start learning metal techniques and exploring new jewelry designs!


My work bench is a table that my husband built from a salvaged counter top.  While in Boston, we used it as much needed kitchen counter space, now it's where most of my jewelry work takes shape from start to finish.  There are typically several different projects scattered about in various stages of completion.  The square bulletin boards are ones I made from some frames (glass removed), and cork board that I covered in fabric.  Super fun and easy!  Maybe I'll post the tutorial sometime.  The little rack that is used to hang completed earrings and necklaces is actually a wire dish rack turned on its side and attached to the wall. 


Directly to the right is a small table where finished pieces are photographed.  There's great natural light coming through the window for the first half of the day so that's all the lighting I use. 


And the only photo props I use are a sheet of scrapbook paper, my dress form, and a cluster of branches (found outside which I painted white, cut into segments, and attached to a candle holder that holds 12 tea light candles).


Then directly right of my photo station is my shipping station.  I use a baker's cart and it holds everything I need to package and ship my jewelry.  It's slightly in disarray, but it's all there and makes packaging so much more efficient.


And finally, a little happy collection on the corner of my shelf.  Vintage ceramic baby booties from simplysuzula, a little clay snowman that my son made in his preschool class this winter, a wooden carving of the Cristo Redentor (Christ the Redeemer) statue at the Corcovado in Rio de Janeiro, Brazil (where my husband proposed to me 5 years ago), and one of my favorite prints from f2images.


On many occasions, I get a helper or two in my studio to help me organize my supplies.  It's actually the opposite of that, but they're fun to have around.  :)


I always enjoy peeking into another artist's work space, so I hope you enjoyed the tour.  I'll post a studio update once I get the metal working area set up.  I'm so excited and impatient for this to happen, but realistically, it will be a little while before it does because baby #3 will be here very soon (we're super excited about that too!), but we all know what that means... my jewelry work will be on hold indefinitely.  But do be prepared for an influx of baby pictures. :)

Have a beautiful weekend, everyone!

8.22.2011

Weekend Project :: Memorabilia Necklace


I was digging through my jewelry box Saturday and came across a bunch of my old letter jacket pins from high school.  Immediately, I thought of the idea to upcycle them into a charm necklace so I ran into my studio to whip it together.  After some bending and a few jump rings, voila!


I also added a few trinkets from the pieces of jewelry I wore back in high school, along with a couple new beads to balance it all out.  I stuck with the blue scheme because those were my high school colors (although they were slightly different shades of blue).  I was searching for some old necklaces that I handmade back then so that I could weave them into this piece, but couldn't find them anywhere.  I'll keep digging...


I'm pretty happy with how it turned out, but I may revise it a little more... like clustering the charms more toward the bottom of the necklace so they're not so spread out.  That would make it more wearable for me.


This was super simple and quick, and makes for a meaningful one of a kind piece of jewelry!  I bet you could pull together some trinkets and breathe new life into them too!

What kind of upcycling projects have you done?  Please share!


4.07.2010

Sneak Peek :: new sparklies

Here's a peek at just a few new gem strands I have.. just waiting.. screaming at me to create something with them.  Now, where should I start??

with the amethyst, lemon topaz, swiss blue topaz, green flourite?..

or the silky smooth chalcedony?


or these gorgeous herkimer diamonds?


or these yummy hammered smoky quartz nuggets?


or the mother of pearl, agate, opal, amethyst mix?

or these amazing fire agate rounds?


or phrenite? (which reminds me of tortoise shell..which I love!)


Help!


2.23.2010

In the Studio :: it is safe to say, I am obsessed


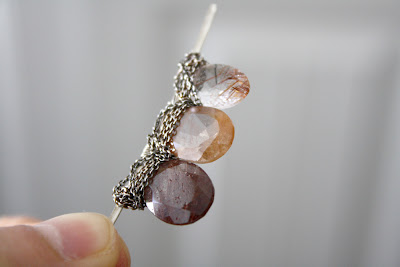
It's no secret, I'm addicted to gemstones.  And my latest gemstone obsession is anything and everything mossy, rutilated, and tourmalinated.  So when I came across these one of a kind beauties, I absolutely had to have them.  Absolutely.  It's not every day that you come across brilliant-cut gems (with pavilion facets and a table front surface, usually cut for settings) that are drilled like briolettes...AND they're an assortment of tourmalinated and rutilated quartz in various glorious colors!  I couldn't resist.  It didn't matter that I really couldn't afford them or that I had no idea what I would do with them.  I just knew that if I didn't buy them, I would lose sleep (yep, that's my purchase meter).  So after receiving them a few weeks ago, they just sat on my work table, gleaming at me.  And finally...I had some time this past weekend to play with them.. and this is what I made.


I wire-wrapped each gem individually onto hand forged and hammered sterling silver wire, then wrapped the entire piece in a delicate oxidized sterling chain.  Each stone is so gorgeous on its own, but I thought they were even more brilliant together in one piece.  I also made a couple smaller pieces as well.


The thing I love about all of these pieces is that you can wear them with the flat surface forward, or with the pavilion side forward.. both ways are equally stunning.  Now they're just waiting to be finished with some sterling silver chain.  I can't decide if I should oxidize the chain or not.  What's your recommendation?  Once I finish these pieces, they'll be available in my shop.  Maybe... only if I can bear to part with them.  ;)

I also have a few other pieces that I finished in gold that I'll share with you shortly.

As always, thank you for stopping by!

2.26.2009

In the studio :: Metal Clay Project #1


My wonderful husband Alex volunteered to be on daddy duty full time one entire weekend, just so I can dabble (uninterrupted) in my new infatuation: metal clay. It is quite the process and it is so much more difficult and time consuming than I thought. I'm sure with more dabbling, I'll get much better at it, but for now, it took me all weekend long to make just one pendant!

I was commissioned by a friend to recreate a modernized (yet antiqued and classic) version of the famous Anne Boleyn necklace for his girlfriend as a Valentine's Day gift for her. Here are pictures of the necklace... a strand of white pearls with an initial pendant and three teardrop pearl dangles. Pictured are both the letter B and the letter A versions. He wanted the letter A (click on the image for a closer view).


Not truly knowing how this was going to turn out, given that I've never before made a pendant from scratch, I immediately accepted the mission (naturally!). I wanted to play around and make a few practice pieces of jewelry before I got to making this pendant, but after unwrapping the actual clay, I realized I didn't have much to "play around" with. That stuff is expensive for little ol' me. Not much comes in a package and I'm not about to waste a gram of fine silver! I figured that if it didn't turn out the way I liked, I could always start over. That's one great thing about metal clay.. before you fire a piece, you can reconstitute a dry piece of clay by soaking it in a damp sponge overnight (or however long it takes) until it softens into the clay texture again. So with that decided, I opened my trusty books and clay and the plethora of tools required and plunged in head first.

It was NOT smooth sailing. I wanted to photograph each step, but had to skip the entire clay forming portion of this project because my hands were a complete mess. Here's why: before starting to shape anything with the clay, you're supposed to knead it until it resembles one continuous ball of clay, with no seams or cracks. Sounded simple right? And it should've been. But the first book I was reading advised to coat my hands in a bit of olive oil or balm so that the clay didn't stick to them. So that is what I did. Sure enough, the clay didn't stick to my hands. But problem was that it didn't stick to itself either. That made "integrating" it really difficult. It was not the smooth ball that was pictured in the book. And metal clay dries much quicker than I anticipated! Knowing the kind of pace I would be working at, I even got the slow dry clay (which dries 5 times slower than regular metal clay). I can't imagine how quickly regular clay would dry (probably within a couple minutes of being out of the package). So now, I had to spritz a little water to get it soft again. Sounds simple.. again, should've been, but was definitely not for my first run. Aparently, my spritzer bottle sprays too much water. I sprayed the drying lump of clay in my hand and ended up with a soggy mess. The clay was too wet on the outside and still tough on the inside. Again, "integrating" it was practically impossible. I was crying a little on the inside seeing all the wasted fine silver that was smeared all over my ungraceful hands.

Frustrated and not really sure of what to do next, I then consulted the second book I had (which I should've read first!) and it had slightly different (and much better) recommendations. Rather than coating my hands in olive oil, that was advised against because it would make the clay difficult to integrate. That book also stated that out of the package, the clay is usually in the perfect condition for shaping and only needed a couple seconds of kneading... and that it wouldn't stick much to your hands anyway. True, true, and true.. speaking from recent experiences. :) It also advised that when wetting the clay, it's best to roll it out flat, wet the top and fold it in half (and repeat until folded over a few times). That way, the clay gets moistened on the inside (where it's needed) rather than on the outside (where it would make a mess). Again, true. Lessons learned the hard way. Another lesson learned: read the books thoroughly before starting rather than skimming the pages. I tend to get excited about things and get ahead of myself sometimes. :)

So with that, I finally got to shaping the clay. Due to the olive oil mishap, it wasn't perfectly smooth like I had hoped for. There were some visible seams and such that I tried to improve on using clay paste and clay slip. *clay paste is just metal clay mixed with some water so that it's the consistency of toothpaste; used for filling in large gaps glueing together broken pieces of clay. *clay slip is a more watered down version of paste used for filling in fine lines and cracks. Another nice thing about metal clay is that you can used scraps of clay that is cut or filed off from your piece to make paste and slip so not much is wasted in the end.

So after several hours of feeling frustrated, I surrendered and put everything away. I left the pendant out to dry overnight. I was hoping the dry process of metal clay would be more promising the next day. At least I got to take pictures this time!

So day 2 started off with the dried pendant you see pictured first. Prior to drying, I placed the 4 fine silver key pins into the pendant and sealed any openings with the clay slip. It was then dried overnight.. and just to be sure that it is bone dry (a must before firing; your piece might crack and get distorted during the firing process if not completely dry) I baked it in the oven on a ceramic tile. Once dried and cooled off, then came the filing with needle files. Because the pendant was very rough and ugly, I had a lot of filing to do! At this point, I wasn't very optimistic and was preparing to scrap the whole thing and start over. Needle filing took up a lot of time. I wanted to be careful not to break the clay because at this stage, it's pretty fragile. But the pendant held up superbly, even when I had to put a little elbow grease into it. After filing down the internal edges with the needle files, I sanded down the surfaces and outer edges with a sponge sander.

This is what it looked like after needle filing and sponge sanding. Mostly smooth, with a few soft wrinkles on the surface.

I wasn't quite happy yet with it so I kept sanding it down with a finer grit sanding pad. The third shot (right above) is where I stopped just prior to firing. I think I sanded and filed for a good couple hours. I told you I had a lot of filing and sanding to do.

Then came the firing. You can do this in a kiln, but for those of us who don't have the professional equipment, a gas stove will do just fine. Yet another reason why I love metal clay. Firing only took about 4 minutes. This part made me nervous because I didn't want to fire it too long or get it too hot. You're supposed to get your piece fired to a nice, soft orange glow. I couldn't really tell what color it was while the flame was under it so I just held my breath and hoped for the best. When the timer went off and I turned off the flame, sure enough, it was a soft orange glow. *phew*

I then had to quench it in some water, and then, more elbow grease was required. Now came the polishing portion. I first brushed off the residue with a stainless steel brush.

I then used a burnisher to get it to shine a little more.

Then, more polishing with micro-fine grit sanding pads. I started with the coarser grit and gradually moved onto finer grit pads. This took a little while and a lot of elbow grease, but I wanted to see if I could get that mirror shine. As you can tell, that really made a difference. (I also got a good upper body workout in the process... win-win!).

Finally, I oxidized the pendant in some liver of sulfur, along with the other silver components I would use in constructing the necklace. I then brush polished it again with a softer bristled stainless steel brush. This ended up scratching the surface of my mirror shine so all that hard polishing work was for nothing. But it gave the pendant a nice brushed, rustic, antiqued look. Even the little imperfections from the clay not being well integrated added that extra charm and personality to the pendant.

And here it is in the completed necklace--a more modern version of the classic Anne Boleyn necklace... finished with sterling silver chain, freshwater pearls along the chain, and swarovski teardrop pearls beneath the pendant.


And that marks the end of my first metal clay project! I'm so excited I didn't have to scrap the whole thing and start over. It was quite the adventure and not at all as simple and easy as playing with play-dough when I was younger. And the recipient of this gift really loved it so I was even more thrilled about that!

I do have several more ideas floating around in my sketch book of what I want to make next and am just waiting for another free weekend to dive right back in.