
 |
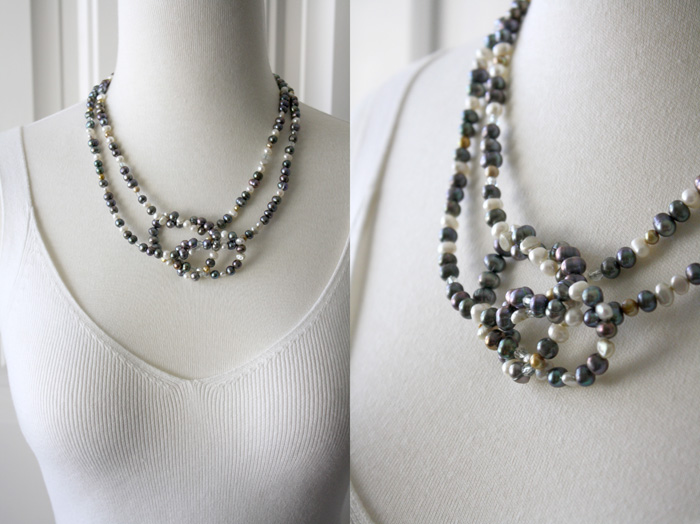
| Add a couple loose knots to the eNVe 50-inch Wrap Necklace and Voila! |
As I was taking photos of one of my 50-inch Wrap necklaces to list in the shop, I stumbled upon a couple more quick and easy ways you can really add some edge and even more variation to how you style this classic piece of jewelry!
I wonder if I'm the only one to get excited about things like this, but I really do! As I am with clothing in my wardrobe, I like to mix things up as often as possible because I get bored of wearing the same outfits and the same jewelry in the same configurations all the time. This may be a little nutty of me, but throughout middle school and high school, I actually had a calendar where I wrote down what I wore every day just so I don't repeat the same outfit for at least a month. I didn't have a lot of clothes so this was a fun challenge for me. (Please tell me someone else out there did this too.. if you must, just lie to me so I don't feel like a super dork). Obviously more important things in life took over and I let go of this ridiculous calendar, but my natural inclinations are still there--it's just no longer at a clinical level. ;) Anyway, that just explains why things like this make me happy.
If you own one of my 50-inch necklaces or are familiar with them, they're quite simple really.. just a single strand of beads (either strung or wire wrapped) that is 50 inches in length, closed with a toggle clasp. Obviously this was not something I invented. Extra long necklaces have been around for ages. Before I began designing jewelry, I had several extra long necklaces in my personal collection. I loved them and appreciated the versatility, but still felt limited in how I could wear them. Many of them didn't even have a clasp to open and close, just one continuous strand that I had to pull over my head. I finally decided to make my own, adding a toggle clasp and an extra 20 inches to the typical opera necklace length (which is usually around 28 to 34 inches), just to maximize the versatility. This style is seriously a staple for me in my personal wardrobe.
Here's a sampling of how I would typically wear this necklace.

Another favorite way to wear is as a multi-strand bracelet.

Then I began playing with it a bit more just to see if I could come up with any other ways to wear it, I realized that with a couple of loose knots, I could change the look dramatically. Here are a few versions:
CAVEAT: Before I start, I just want to caution that if you're working with a strand of beads strung on a single wire or thread, be mindful of the tension in the necklace while you're looping and knotting it. You don't want to force anything while doing this because the necklace may break under too much tension and you'll have a pile of beads to sweep up. The size of the beads on your necklace will influence how much "give" your necklace will have (the smaller and rounder the beads, the more flexibility you'll have). If you're working with a knotted strand of pearls or a necklace with individually wire wrapped beads, you don't really have to worry about this tension issue. (And if you're trying this tutorial with an eNVe 50-inch wrap necklace and you happen to break it, I'm happy to restring it for you for free). :)
The Series Knots
1) Open the toggle clasp so the necklace is one long strand. Find the center of the necklace and place it around the back of your neck so the toggle is open and in front of you.
 |
| 2 times over and under, creating the first loose loop in the series |
3) Take the ends of the necklace and bring them up behind your neck and close the toggle. You'll instantly have this look below.
4) Or you can continue to add another over-and-under weave to get another loose knot in your series...


...bring the ends up and behind your neck to close the clasp...

...and you'll have something that looks like this...

The Side Knots
1) Open the toggle clasp so the necklace is one long strand. Find the center of the necklace and place it around the back of your neck so the toggle is open and in front of you.
2) Loosely knot each side once. Make sure the knots are asymmetrical so they don't overlap later.

3) Cross the open ends of the necklace in front of you, bringing them up and behind your neck to close the clasp.

You could probably make multiple knots on each side (if the tension in your necklace allows), for a shorter, chunkier look.
The Random Knots
1) Open the toggle clasp so the necklace is one long strand. Find the center of the necklace and place it around the back of your neck so the toggle is open and in front of you.
2) Cross the open ends of the necklace and begin looping over and under. For this look, I just randomly twisted and knotted, following what the tension of the necklace would allow.

2) Once finished with the knots, pull the open ends up and behind your neck to close the clasp.

3) When the necklace is clasped closed, you can still make some adjustments to your "focal" by gently pulling and tucking the strand into your desired positioning.

And there you have it. Have fun with it and let me know if you try any of these styles or have discovered some of your own! I'm always up for expanding my versatility arsenal!
Have you tried some "out of the box" ways to wear your jewelry? What have you discovered?

No comments:
Post a Comment